.png)
-modified.png)

As a roofing professional, keeping track of your jobs, leads, and milestones is crucial for running your business smoothly. While AccuLynx CRM is a fantastic tool for managing your operations, sometimes you might want to view your data in a spreadsheet format for easier analysis or reporting. In this guide, we'll walk you through the simple steps to pull your AccuLynx data into Google Sheets using the AccuLynx API.
Don't worry if you're not a tech guru! We'll keep things straightforward and easy to follow.
Why Import AccuLynx Data into Google Sheets?
As a roofing professional, accessing your AccuLynx data in Google Sheets allows you to:
- Customized Reporting: Build reports tailored to your specific business needs.
- Data Analysis: Easily sort, filter, and analyze data for insights.
- Collaboration: Share data with team members without AccuLynx access.
- Real-Time Updates: Refresh data to ensure you have the latest information.
What You'll Need
- An AccuLynx Account: Ensure you have access to your AccuLynx CRM.
- A Google Account: So you can use Google Sheets.
- API Access Key from AccuLynx: We'll show you how to get this.
Step 1: Obtain Your AccuLynx API Key
An API key is like a password that allows Google Sheets to access your AccuLynx data securely.

How to Get Your API Key:
- Log into AccuLynx:
- Go to AccuLynx Login and sign in with your credentials.
- Navigate to API Settings:
- Select "Market" from the navigation bar
- In the menu, select for "App Connections".
- Scroll to the bottom of the page and select "API Keys"
- Select "Manage Connection"
- Generate an API Key:
- Click on "New".
- A new API key will be displayed. Copy this key and keep it somewhere safe. You'll need it later.
Note: Treat your API key like a password. Don't share it with unauthorized individuals
Step 2: Set Up Your Google Sheet
Now, let's set up a Google Sheet that will display your AccuLynx data in an organized and accessible way.
Create a New Google Sheet:
- Go to Google Sheets:
- Navigate to Google Sheets and sign in if prompted.
- Create a New Spreadsheet:
- Click on "Blank" to create a new spreadsheet.
Set Up Your Sheet Layout:
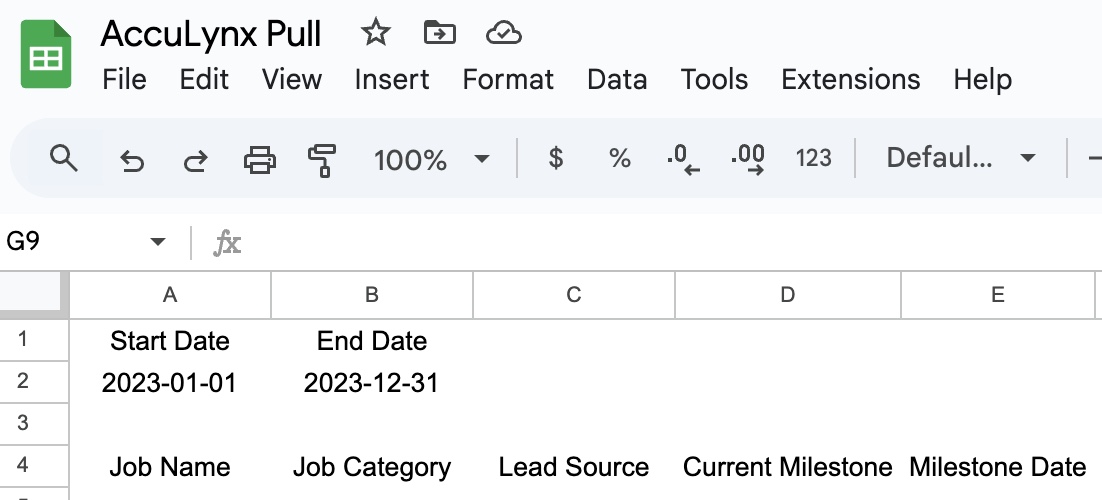
- Enter Start and End Dates:
- In cell A1, type "Start Date".
- In cell B1, type "End Date".
- In cell A2, enter your desired start date (e.g.,
2023-01-01). - In cell B2, enter your desired end date (e.g.,
2023-12-31).
- Set Up Column Headers:
- In row 4, starting from cell A4, enter the following headers:
- Job Name
- Job Category
- Lead Source
- Current Milestone
- Milestone Date
- In row 4, starting from cell A4, enter the following headers:
- Your sheet should look like this:
Step 3: Add the Script to Pull Data
Now, we'll use a small piece of code to fetch your job details from AccuLynx and populate your Google Sheet.
Open the Apps Script Editor:
- Access Script Editor:
- In your Google Sheet, click on "Extensions" in the top menu.
- Select "Apps Script". This will open a new tab with the script editor.
Insert the Script Code:
- Delete Existing Code:
- If there's any code in the editor, you can delete it to start fresh.
- Paste the Code:
- Copy and paste the following code into the editor:
function importAccuLynxData() {
  var sheet = SpreadsheetApp.getActiveSpreadsheet().getActiveSheet();
  var startDate = sheet.getRange("A2").getValue();
  var endDate = sheet.getRange("B2").getValue();
  var apiKey = "YOUR_API_KEY_HERE"; // Replace with your actual API key

  // Format the dates to 'yyyy-MM-dd'
  startDate = Utilities.formatDate(new Date(startDate), "GMT", "yyyy-MM-dd");
  endDate = Utilities.formatDate(new Date(endDate), "GMT", "yyyy-MM-dd");

  var url = 'https://api.acculynx.com/api/v2/jobs?' +
    'pageSize=25' +
    '&startDate=' + startDate +
    '&endDate=' + endDate +
    '&sortBy=CreatedDate' +
    '&sortOrder=Ascending';

  var options = {
    method: 'GET',
    headers: {
      'accept': 'application/json',
      'Authorization': 'Bearer ' + apiKey
    }
  };

  // Fetch data from the API
  try {
    var response = UrlFetchApp.fetch(url, options);
  } catch (e) {
    SpreadsheetApp.getUi().alert('Error fetching data: ' + e.message);
    return;
  }

  var data = JSON.parse(response.getContentText());

  // Check if data.items exists and has length
  if (!data.items || data.items.length === 0) {
    SpreadsheetApp.getUi().alert('No data found for the given date range.');
    return;
  }

  var items = data.items;
  var output = [];
  for (var i = 0; i < items.length; i++) {
    var item = items[i];

    // Format the milestoneDate to 'MM/dd/yyyy'
    var milestoneDateFormatted = '';
    if (item.milestoneDate) {
      var milestoneDate = new Date(item.milestoneDate);
      milestoneDateFormatted = Utilities.formatDate(milestoneDate, "GMT", "MM/dd/yyyy");
    }

    output.push([
      item.jobName,
      item.jobCategory ? item.jobCategory.name : '',
      item.leadSource ? item.leadSource.name : '',
      item.currentMilestone,
      milestoneDateFormatted
    ]);
  }

  // Clear old data if any
  var numRowsToClear = sheet.getLastRow() - 4;
  if (numRowsToClear > 0) {
    sheet.getRange(5, 1, numRowsToClear, 5).clearContent();
  }

  // Paste new data
  sheet.getRange(5, 1, output.length, output[0].length).setValues(output);
}
Replace "YOUR_API_KEY_HERE":
- In the code, find the line that says
var apiKey = "YOUR_API_KEY_HERE";. - Replace
"YOUR_API_KEY_HERE"with the API key you obtained from AccuLynx earlier.- It should look like:
var apiKey = "abc123def456ghi789jkl0";
- It should look like:
Authorize and Run the Script:
- Save the Script:
- Click on the floppy disk icon or press Ctrl+S (Cmd+S on Mac) to save.
- Run the Script:
- Click on the run icon (a triangle ▶️) next to the function name
importAccuLynxData.
- Click on the run icon (a triangle ▶️) next to the function name
- Authorize the Script:
- The first time you run the script, Google will ask you to authorize it.
- Click "Review Permissions".
- Choose your Google account.
- You might see a warning that the app isn't verified. Click on "Advanced" and then "Go to project (unsafe)".
- Click "Allow" to grant the necessary permissions.
- Note: This is a standard Google warning for scripts that haven't been submitted for verification. Since you're the creator, it's safe to proceed.
- Wait for the Script to Complete:
- The script will run and fetch your data. This might take a few moments.
Step 4: View Your Data
Go back to your Google Sheet. Starting from row 5, you should now see your AccuLynx job data populated under the headers:
- Job Name
- Job Category
- Lead Source
- Current Milestone
- Milestone Date
Troubleshooting Tips
- No Data Appears:
- Double-check your start date and end date in cells A2 and B2.
- Ensure your API key is correctly entered in the script.
- Verify that you have jobs within the specified date range in AccuLynx.
- Error Messages:
- If you receive an error, check the script editor for details.
- Ensure that the API endpoint URL and headers are correctly formatted.
- Data Not Updating:
- Run the script again to refresh the data.
- Consider adding a button to your sheet to make running the script easier (see below).
Optional: Add a Refresh Button
To make it even simpler to update your data, you can add a button to your Google Sheet.
How to Add a Button:
- Insert a Drawing:
- In your Google Sheet, click on "Insert" > "Drawing".
- In the drawing tool, create a simple shape or text box that says "Refresh Data".
- Click "Save and Close".
- Position the Button:
- Move the drawing to a convenient spot on your sheet.
- Assign the Script to the Button:
- Click on the button.
- Click on the three dots in the top-right corner of the button.
- Select "Assign script".
- Enter the script function name:
importAccuLynxData. - Click "OK".
Now, whenever you click the "Refresh Data" button, the script will run, and your data will update.
Congratulations!
You've successfully imported your AccuLynx data into Google Sheets. Now you can:
- Sort and filter your jobs.
- Create charts and graphs.
- Share the sheet with team members.
Stay Secure
Remember, your API key grants access to your AccuLynx data. Keep it confidential and avoid sharing your Google Sheet with unauthorized individuals.
Need Help?
At Bravo Solutions, we specialize in helping businesses like yours leverage technology to its fullest potential. Whether you need custom solutions, training, or support, we're here to assist you every step of the way.
Happy Roofing and Data Managing!


